Wat is Art Clay, Metaalklei?
Dit zijn producten gemaakt van pure metaalpoeders, gemengd met bindmiddelen en water. De producten zijn veilig en niet giftig. Art Clay producten zijn gemakkelijk te verwerken. De mogelijkheden zijn eindeloos. De verwerking kan je vergelijken met boetseerklei. Art Clay producten kunnen worden afgebakken op een gasfornuis, met een gasbrander ( Torch) of in een speciale oven. Tijdens het afbakken branden bindmiddelen weg, waardoor puur zilver ( 99,9%), zuiver koper ( meer dan 99,5%) , brons of goud (22K) overblijft. Na het afbakken heb je een uniek en puur zilveren, gouden , bronzen of koperen sieraad.
What is Art Clay, Metal Clay?
These are products made from pure metal powders mixed with binders and water. The products are safe and non-toxic. Art Clay products are easy to work with. The possibilities are endless. The processing can be compared to modeling clay. Art Clay products can be fired on a gas stove, with a gas burner (Torch) or in a special oven. During the baking process the binders burn away, leaving pure silver (99.9%), pure copper (more than 99.5%), bronze or gold (22K). After the baking process you have a unique and pure silver, gold, bronze or copper jewel.
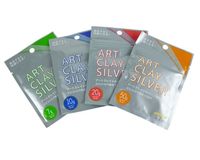
Andere benamingen zijn o.a. zilverklei, bronsklei, koperklei, metal clay, kneedbaar zilver - brons - koper- goud , kunstklei, art klei, precious metal clay
In 5 eenvoudige stappen maak je zelf thuis een zilveren (bronzen, koperen) sieraad
1. Ontwerpen, vormen en modelleren
Ontwerp en boetseer uw sieraad. Hou hierbij wel rekening met de krimp van het product, dit bedraagt ongeveer 8 a 9 %. Zeker bij het maken van ringen is dit natuurlijk van groot belang
2. Drogen
Als uw ontwerp klaar is dan moet het goed worden gedroogd. Drogen kan o.a. aan de lucht, met een föhn of op een warmhoudplaatje. Indien het ontwerp niet goed droog is dan kan het uit elkaar spatten tijdens het verhitten. Om zeker te weten dat het werkstuk goed droog is, kunt u de spiegeltest doen. Leg het warme werkstuk op een spiegel voor een paar tellen. Wanneer er geen condens zichtbaar is op de spiegel als u het werkstuk optilt, is het goed droog.
3. Bijwerken, schuren en vijlen
Het gedroogde sieraad is hard geworden, maar nog wel breekbaar. U kunt oneffenheden bijwerken met Art Clay Silver pasta of spuitpasta. Droog het werkstuk weer na het opbrengen van de pasta. Vervolgens kunt u het werkstuk glad schuren met de schuurdoekjes. Ook babydoekjes zijn in deze fase handig om tot een perfect glad resultaat te komen. En in deze fase kunt u ook patronen of lijnen in het sieraad vijlen of krassen.
4. Verhitten
Als het sieraad helemaal netjes is afgewerkt en alle oneffenheden zijn bijgewerkt, dan is het werkstuk klaar om te verhitten. Art Clay Silver kan op drie manieren worden verhit: 1 op het gasfornuis, 2 met een gasbrander of 3 met een speciale klei-oven. Maar aan het verhitten met een gasbrander of op het gasfornuis zitten wel beperkingen. Dus lees wel eerst de afbak instructies goed door.
5. Polijsten
Nadat het sieraad is ”gebakken” kan het gepolijst worden. Eerst verwijdert u de witte laag met een polijstborstel. Wilt u het sieraad mat houden, dan laat u het hierbij. Voor een hoogglans finish kunt u de schuurdoeken en de polijstnaald gebruiken. En als laatste poets u het sieraad met polijstpasta.
In 5 simple steps you can make your own silver (bronze, copper) jewellery at home
1. Design, shape and model
Design and model your piece of jewelry. Do take into account the shrinkage of the product, this is about 8 to 9%. Especially when making rings, this is of great importance.
2. Drying
When your design is ready, it must be dried thoroughly. Drying can be done by air, with a hair dryer or on a hot plate. If the design is not properly dry, it may disintegrate during heating. To make sure the workpiece is properly dry, you can do the mirror test. Place the hot workpiece on a mirror for a few moments. If no condensation is visible on the mirror when you lift the workpiece, it is properly dry.
3. Finishing, sanding and filing
The dried piece has become hard, but still fragile. You can touch up unevenness with Art Clay Silver paste or spray paste. Dry the piece again after applying the paste. Then you can sand the workpiece smooth with the sanding wipes. Baby wipes are also useful at this stage to achieve a perfectly smooth result. And at this stage, you can also file or scratch patterns or lines in the jewelry.
4. Heating
When the piece of jewelry has been finished off neatly and all irregularities have been touched up, it is ready to be heated. Art Clay Silver can be heated in three ways: 1 on the gas stove, 2 with a gas burner or 3 with a special clay oven. But there are limitations to heating with a gas burner or on a gas stove. So please read the baking instructions carefully first.
5. Polishing
After the ornament has been "baked" it can be polished. First you remove the white layer with a polishing brush. If you want to keep the jewelry matte, you can leave it at that. For a high gloss finish you can use the sanding cloth and the polishing needle. And finally you polish the jewel with polishing paste.